Turn your frequently used contracts into automated templates
-
Creating automated templates
With Precisely, you can automate and streamline your contract creation process by using automated templates.
Step 1: Creating a template
Step 2: Creating references and questions in the documents
Step 2.1: Creating formulas
Step 2.2: Making clauses conditional
Step 3: Creating sections for themed references
Step 4: Adding conditions for approvals
Step 5: Creating a preparation checklist
Step 6: Adding default signees
Step 7: Adding more automated settings
Step 7.1: Adding default folder selection
Step 7.2: Adding appendices
Step 7.3: Adding reminders
Step 1: Creating a template
-
Click Templates in the top menu and click the green New template button on the top left,
-
Select whether you'd like to

a) Start from scratch by clicking the Create blank button
b) Use one of your existing Precisely templates by clicking From template, or
b) Upload a document by clicking Import Word file.
-
Enter the title and description of the template, choose access policy and click the blue Create button.

Importing Word files?
⚠️ Warning: Please note that some formatting such as images and tables may be lost when importing template documents. You are able to style and format your documents in the Precisely editor.
💡 Pro tip: Prepare your template in .docx by using [square_brackets] to mark variable parts of your contract. Once imported, everything will be automatically converted into Precisely smart templates. Keep reading to learn more about smart templates👇
Step 2: Creating references and questions in the documents
References and their questions are used for variable parts of the template that change from contract to contract, such as names, dates, and contract values.
To create references and choose which parts are variable, start by opening the document in the Precisely editor by clicking the Edit button in the template overview.
💡 If you are using an existing Word template to create an automated Precisely template, you can let Precisely AI do the work by creating references and suggesting where to insert them. Read more about the feature and how to try it out here.
Creating references
Create references using the Add reference section on the left-hand side of the editor. For each reference, you will determine a question that the user drafting from the template should answer. The answers given to the questions will populate the variable parts of the contract, such as "What is the subject of disclosure?" or "What is the name of the counterparty?"
Clicking "Show more options" will allow you to set up more details, such as helping text, examples, or pre-filled answers.

Inserting references
Each reference will have a certain id in the form of a reference name. Wherever the response to a reference should be inserted into the document, you can insert the reference name. For example, the name of the reference for "What is the subject of disclosure?" could be disclosure_subject. Wherever the subject of disclosure should appear in the contract, you can insert the reference name disclosure_subject.
When a user generates a draft from the template, the reference name will be replaced with the answer given to the reference question.
You can add references to a template document in two ways. Either
-
Click Insert in the editor’s top menu and select references, or
-
Click the green Insert reference button (the arrow symbol) in the editor’s left-hand menu.

Types of references
There are different types of references to choose from for your questions:
-
Short text – the answer is a short, single row, free text answer.
-
Long text – the answer is a long, multiple row, free text answer.
-
Numeric – the answer is a number. A question using a numeric answer could be “What shall the penalty cost amount to in case of material breach?”
-
Date – the answer is a date. A question using a date answer could be “What is the start date of the employment contract?”.
-
Multiple choice – if the options for an answer can be predefined, you can use a multiple choice reference. The user drafting from the template will only be able to choose an option from the predefined answers to the question. Turn on the "Allow multiple selection" toggle to allow users to select more than one option.

-
Multiple clause – you can use the multiple clause option if the user drafting from the template should choose between multiple clause alternatives. For instance, if there are different versions of non-compete clauses. This option is ideal for advanced users who can review the clause options and their meanings diligently.
To set up a multiple clause reference, simply
-
Choose Multiple clause in the Reference type drop down,
-
Fill out your question and set a reference name,
-
Click the Add clause button to add clauses as needed, click the Edit button (the pencil) next to the clause to create and edit the content. When you've finished editing the clause, click the blue Save button.

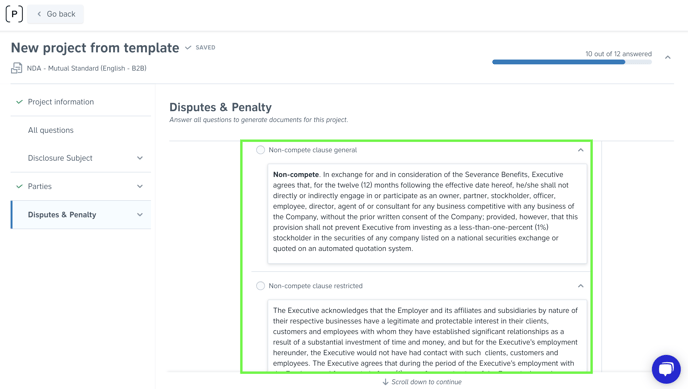
The above screenshot displays an example of what a multiple clause question looks like to users drafting from the template.
👉Read More: How do I decide which reference type to use?
Making references conditional
References can be made conditional by switching on the Add conditions toggle in the reference editing view. When references are made conditional, they will be shown based on answers given to previous questions, and only if the conditions are met.
Example: A non-disclosure agreement may contain a reference asking, “Shall a penalty clause be included in the contract in case of a material breach?” If the answer is “Yes”, a conditional reference asking, “What shall the penalty amount to in case of a material breach?” could be included.

Step 2.1: Creating formulas
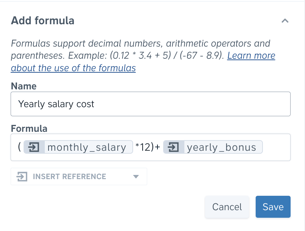
If a specific sum should be calculated in your template document, such as a quotation, price-per-unit, or total salary, you can create a reference-based formula to calculate the answer.
To create a formula, simply
-
Find the Add formula section under the references in the editor's left-hand menu,
-
Set a reference name for the formula and create the calculation by inserting references and operators. Click the blue Save button. Allowed operators and their uses are:
“( )” - Parentheses
“+” - Addition
“-” - Subtraction
“*” - Multiplication
“/” - Division -
Insert the formula by clicking Insert in the editor’s top menu, or by clicking the green Add formula button (the arrow symbol) next to the formula in the editor’s left-hand menu.
Learn more about formulas and see different examples
Step 2.2: Making clauses conditional
If clauses in the template should be included or excluded based on answers given to references, you can make them conditional. The same logic applies to conditional clauses as it does to conditional references, as described above.
To make a clause conditional, simply
-
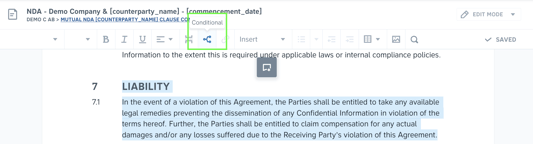
Highlight the body of text for the clause that should be made conditional,
-
Click the Conditional button (the branching icon) in the toolbar to create a block around the clause,
-
Select Add condition in the block and choose which rules should apply, e.g., that the block shall only appear if the answer to a reference is "Yes".
-
Click the blue Save button.


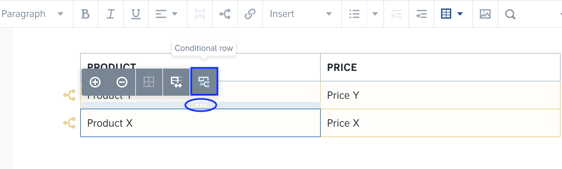
Making conditional table rows
Besides being able to set up conditions for entire paragraphs of text in the template document, you can also set up conditional rows in tables. This means that a certain table row will only appear when certain conditions are met.
Using the same logic, simply:
- Click the grey bar above a selected column to reveal the in-context menu,
- Click the Conditional row button, select which reference the row should depend on, and set the criteria.
Step 3: Creating sections for themed references
Sections are used to group themed references and improve the experience of the user drafting from the template. For instance, the references in a non-disclosure agreement template could be sorted by general terms, parties, and disputes & penalties. We recommend a maximum of 3-4 references per section.
To create a section in the editor, simply
-
Click the Add new section button located under your references in the left-hand menu,
-
Select the order of which you wish to insert the section, give the section a title (optional) and click the blue Create button.


Thereafter, you can sort references and arrange sections by simply dragging and dropping them until you have your desired order.
Note: You can also create sections from your template’s overview by clicking the Add new section button located under your references.

 This is how sections look to users drafting from the template. In the example above, references about General terms are grouped in a section.
Step 4: Adding conditions for approvals
If you have internal rules and processes for approvals, you can decide who is allowed to approve a contract drafted from a template before it’s sent for negotiation or signing.
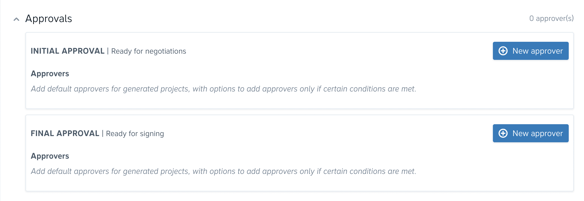
Precisely offers two types of approvals. You can choose to use one or both for each of your templates:
-
Initial approval is made after a draft has been generated from an automated template but before it is sent for negotiation.
-
Final approval is made after the negotiations (and amendments), and before the project is sent for e-signing.
To add approvers, simply
-
Click the New approver button in the Approvals section and select the appropriate approver,
-
Decide whether all approvers must approve contracts generated from the template, or whether an approval from any individual on the approvers list is sufficient. Not requiring approval by all is the default setting.
-
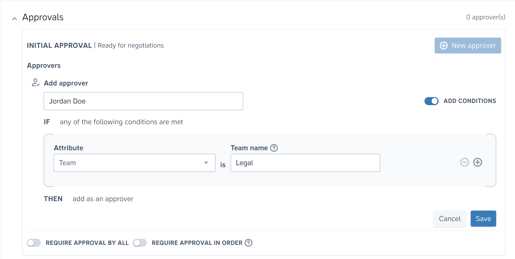
To add conditions for when an approver should approve contracts generated from the template, turn on the Add conditions switcher,
-
Set up the conditions for the approver. You have three options for rule-based approvals and can also create rule combinations by clicking the (+) button next to a condition:
Reference lets you create a condition based on responses to references in the drafting questionnaire. This option is suitable for scenarios such as when you only want the approver to be added to contracts exceeding a certain value.
Contract creator lets you create a condition based on who drafts the contract. This option is suitable for scenarios such as when a specific manager is responsible for approving drafts created by a certain person.
Team lets you create a condition based on the team to which the person drafting the contract belongs. This option is suitable for scenarios such as when you have specific approvers for different departments.
When a contract needs approval, the approvers will automatically receive email notifications. All contracts that need approval also appear in their dashboard.
Note: Allow members and managers to reset final approvals by switching on the toggle in the approval settings.

Pro tip: Approval orders let you decide the order that approvals should be made for drafts generated from templates. Create truly powerful automated approval workflows by combining approval conditions with approval orders.
Learn more about smart approvals in Precisely
Step 5: Creating a preparation checklist
You can add preparations that the user must check off before drafting a contract from the template. For example, “I have assured that the counterparty is not insolvent”.
To add a preparation, simply
-
Click the New preparation button in the template’s overview,
-
Enter the preparation text and click the blue Save button.
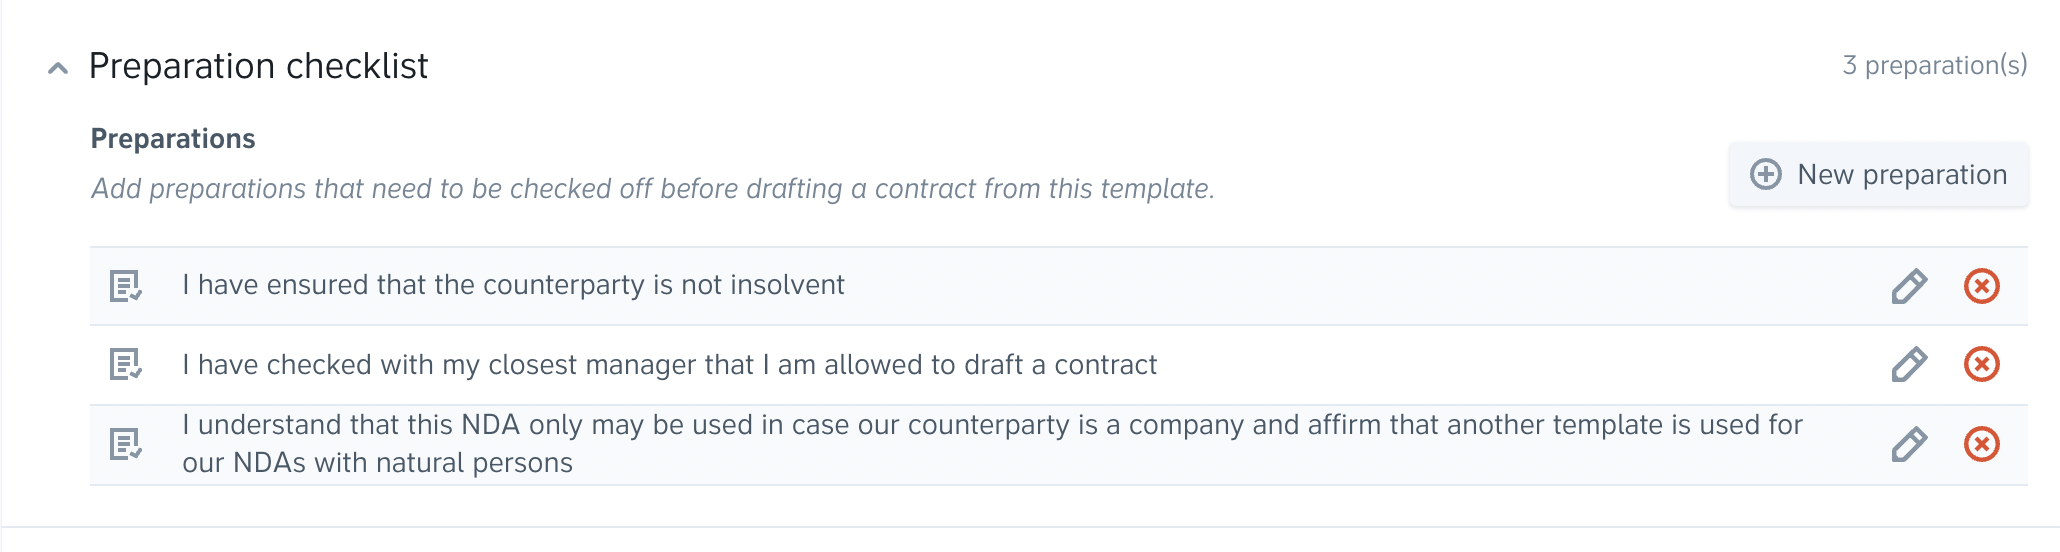

An example of how a preparation checklist looks to a user drafting a contract.
Step 6: Adding default signees
If you have team members who are responsible for signing certain types of contracts, you can add them as default signees to the template. Default signees will automatically be added as signees to contracts generated from the template.
To add default signees, simply
-
Click the Add default signees button in the template’s overview,
-
Fill in the signee's information and click the blue Add button.


Note: When The signee is required checkbox is selected, members will be unable to remove the signee from projects drafted from the template.
Step 7: Adding more automated settings
Explore other smart template settings.
Step 7.1: Adding default folder selection
To add a default archiving folder, simply
-
Open the Archiving settings in the template's overview and,
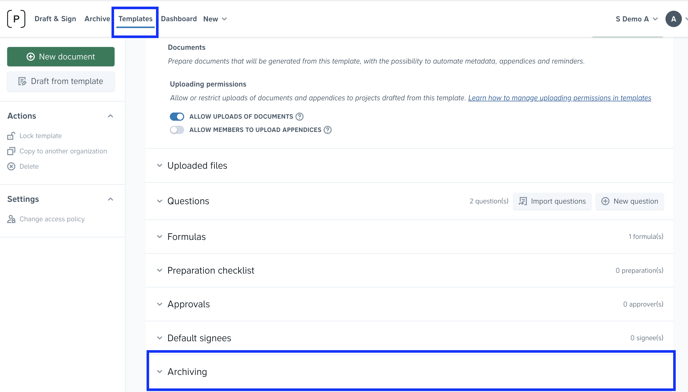
-
Select the default folder (which is mirrored from your archive), or set up advanced rules and click Save. Read more about automated archiving

Note: Switch on the Allow manual folder selection toggle to allow users to override archiving rules and manually select folders when drafting.
Step 7.2: Adding automated metadata tags
-
In the template’s Documents overview, select Metadata and click Add or Edit
-
Create metadata tags for each field by filling out the relevant metadata information.
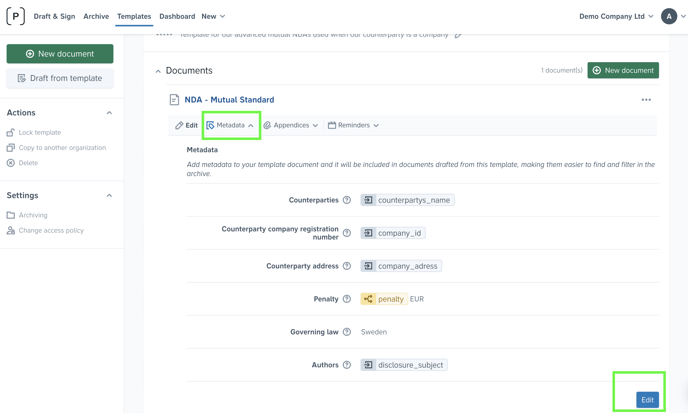

Pro tip: You can connect the input from your template's references to certain metadata tags. The input will be shown in the Archive as metadata for every document drafted from the template. For instance, the answer to the reference question, "What is the name of the counterparty?" can populate the Counterparties metadata tag. Simply fill in the metadata field with the relevant reference.
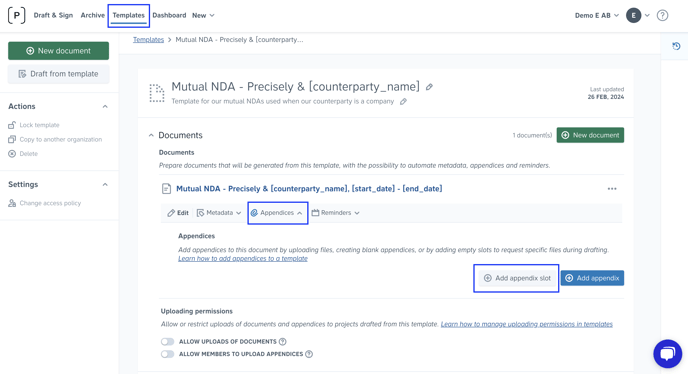
Step 7.2: Adding appendices
There are two ways to add appendices to a template:
1. Upload the appendices to the template document, which will be included each time a draft is generated from that template.
Appendices can be uploaded as static .JPEG, .JPG, .PDF, or .PNG documents. Appendices can also be created in Precisely, meaning you can work with them in the Editor and apply all smart functionalities (references, formulas, conditional blocks, etc.) just like with the main document. Learn more

2. Add appendix slots to enable users to upload appendices while drafting from the template. Appendix slots are useful for cases where the same appendix needs to be added to a document, but with variations (e.g. building plans for an architecture agreement).
Users can upload appendices after drafting a document from the template depending on their user role and the uploading permissions on the template.
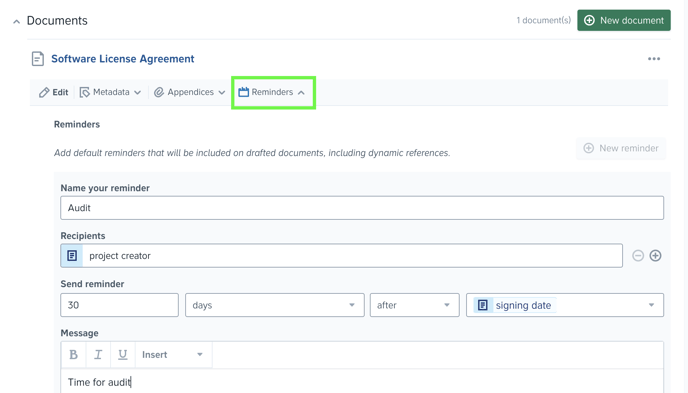
Step 7.3: Adding reminders
Set up reminders to automatically trigger notifications for all important deadlines, expirations, and to-dos. You'll never again miss a date!