-
Using Precisely’s contract archive
With Precisely, you have unlimited and secure storage for all of your contracts.
Importing contracts
All contracts created in and/or electronically signed with Precisely are automatically stored in your digital archive.
While legacy agreements, as well as other agreements that you sign physically, are easily imported. To import contracts, simply:
-
Click Archive in the top menu,
-
Click the green Upload files button in the top left,
-
Browse and select the files you want to upload
Vóila! Your contracts are now stored in your secure Precisely archive.

Creating a folder
Folders are used to organize e.g. multiple contracts of the same type or contracts belonging to a certain project. Also, folders let you easily control access to different groups and teams that should (not) be able to view certain types of documents. To create folders, simply:
-
Click Archive in the top menu,
-
Click the green New button on the top left and choose New folder,
-
Name your folder, e.g. "Employee agreements" or "Secrecy agreements", and click the blue Create button.
To create subfolders, repeat these steps when you’re in the main folder.

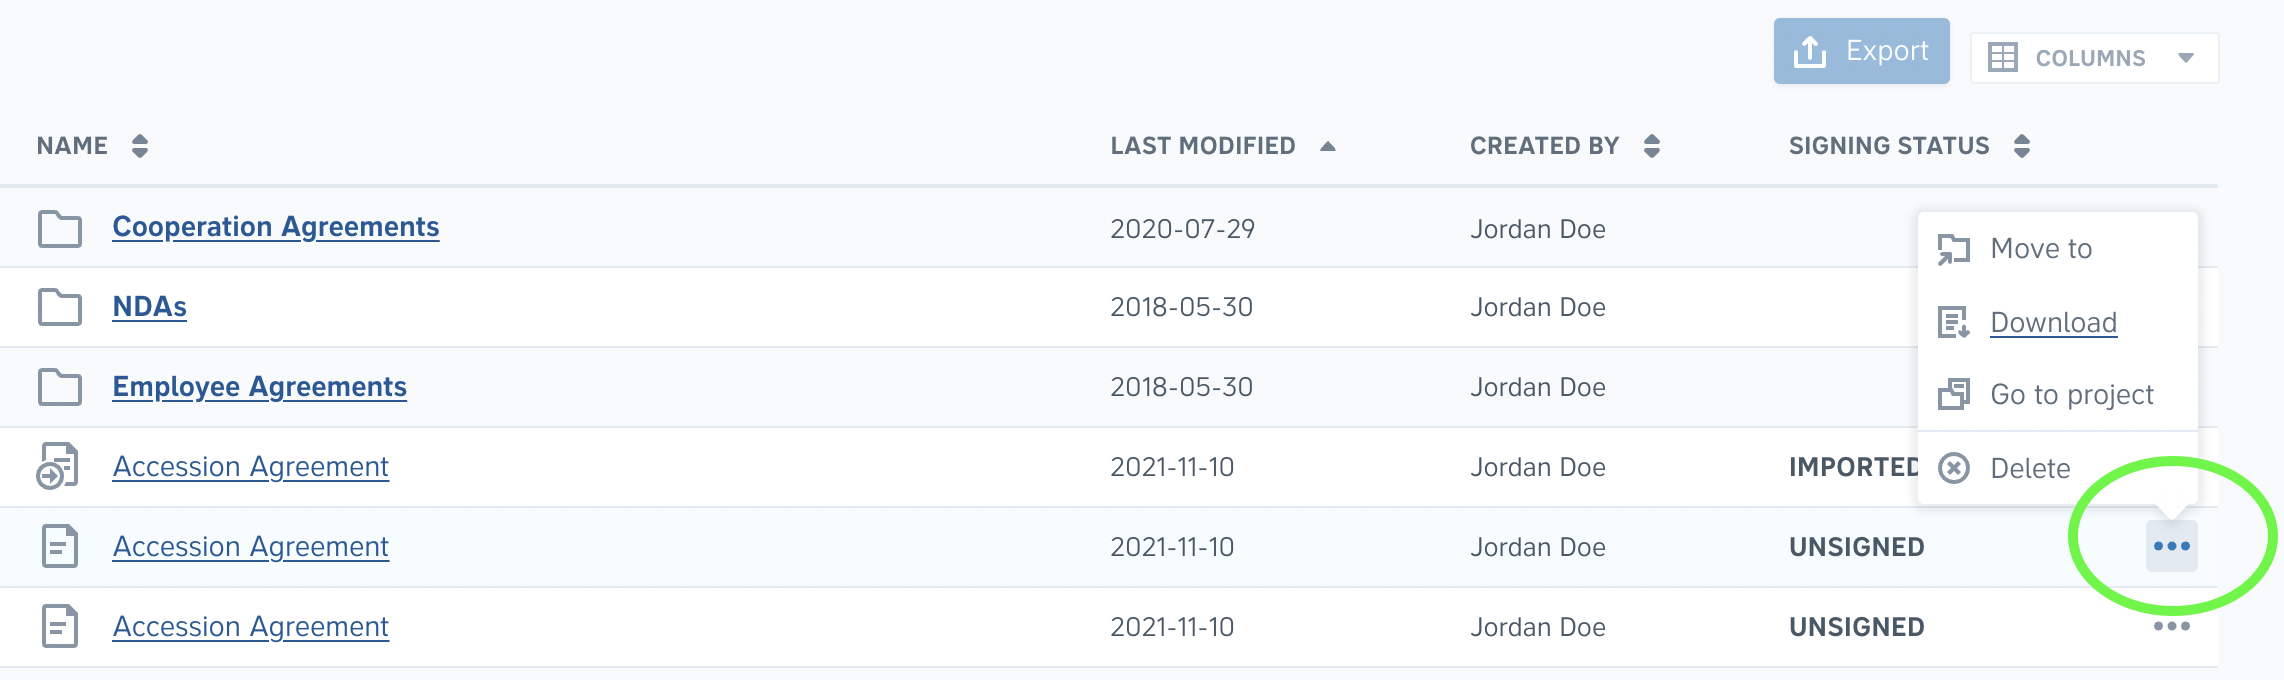
To move a contract to a folder,
-
Drag the contract do the desired folder, or
-
Click the Options button (the three dots) on the right-hand side of the contract you wish to move and choose Move to. Select the folder that you want to move your contract to and click the blue Save button.
Adding metadata to a contract
Metadata is information about your contracts that can also be used to filter and locate them. Contracts created through automated templates in Precisely may already include some metadata points, but you can add or remove data points to contracts as well.
For external contracts you upload or import to Precisely, you can let Precisely AI work for you and automatically suggest metadata keys, values, clauses, and the summary. Read more
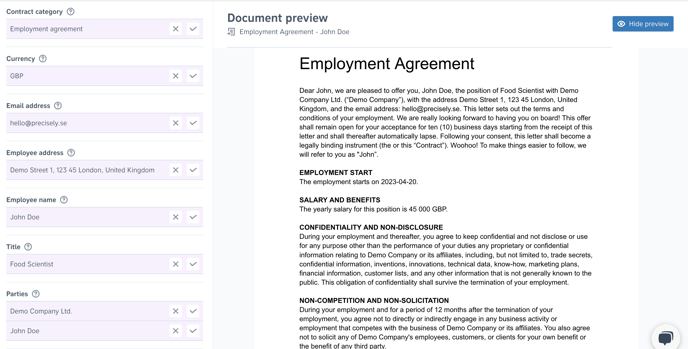
To edit a contract’s metadata, simply:
-
In your archive, choose the contract which metadata points you wish to edit,
-
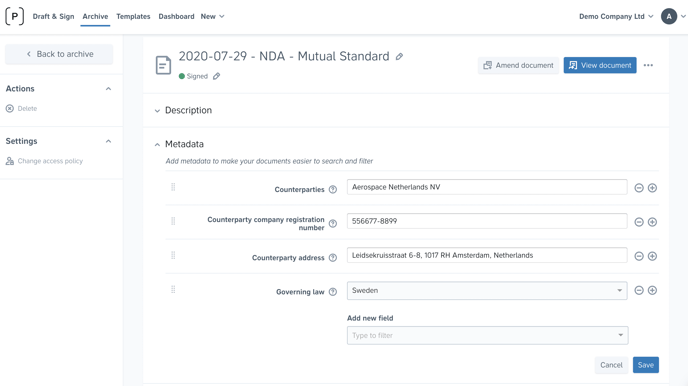
Click the blue Add (or Edit, if the contract already has metadata points) button under the metadata section,
-
Fill out relevant metadata points and click the blue Save button.
You can also set metadata points for template documents, causing all drafts generated from that template to include that metadata.
Adding a reminder to a contract
All documents created or uploaded through a Precisely template can automatically get reminders, thanks to a template and workflow automation.
For your old contracts directly migrated into the Archive, you can easily add a reminder by opening a contract and clicking the "New reminder" button. Learn more about reminders

Finding your contracts
You can use the search and advanced filter functions to locate a contract in your archive:
-
Click Archive in the top menu.
-
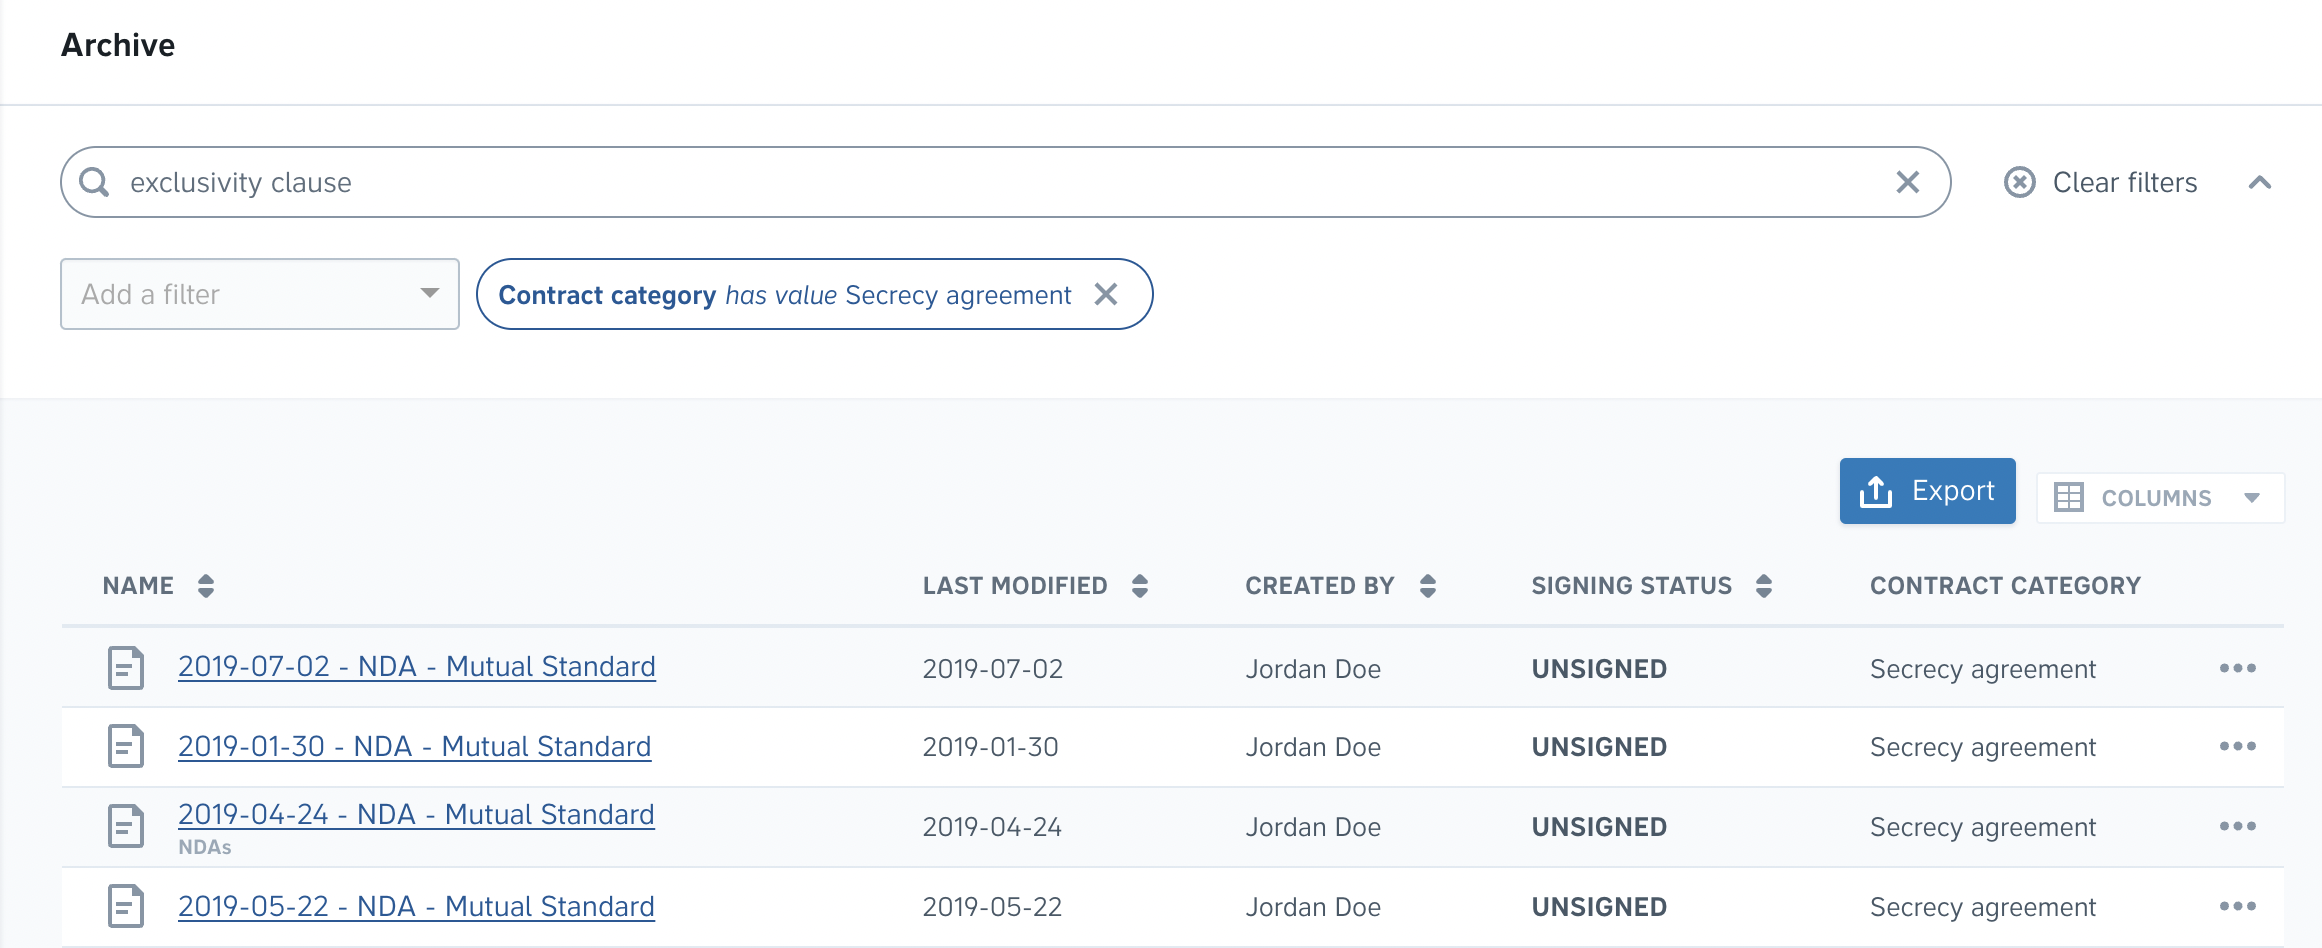
Contracts created through the platform as well as imported .doc and .docx documents are fully searchable. Simply enter your search term in the search box. Some plans also include OCR, making all imported .pdf documents fully searchable.
-
You can also use the extensive range of filters to locate contracts. Click the Add a filter drop-down menu, select a filter and set the conditions.
-
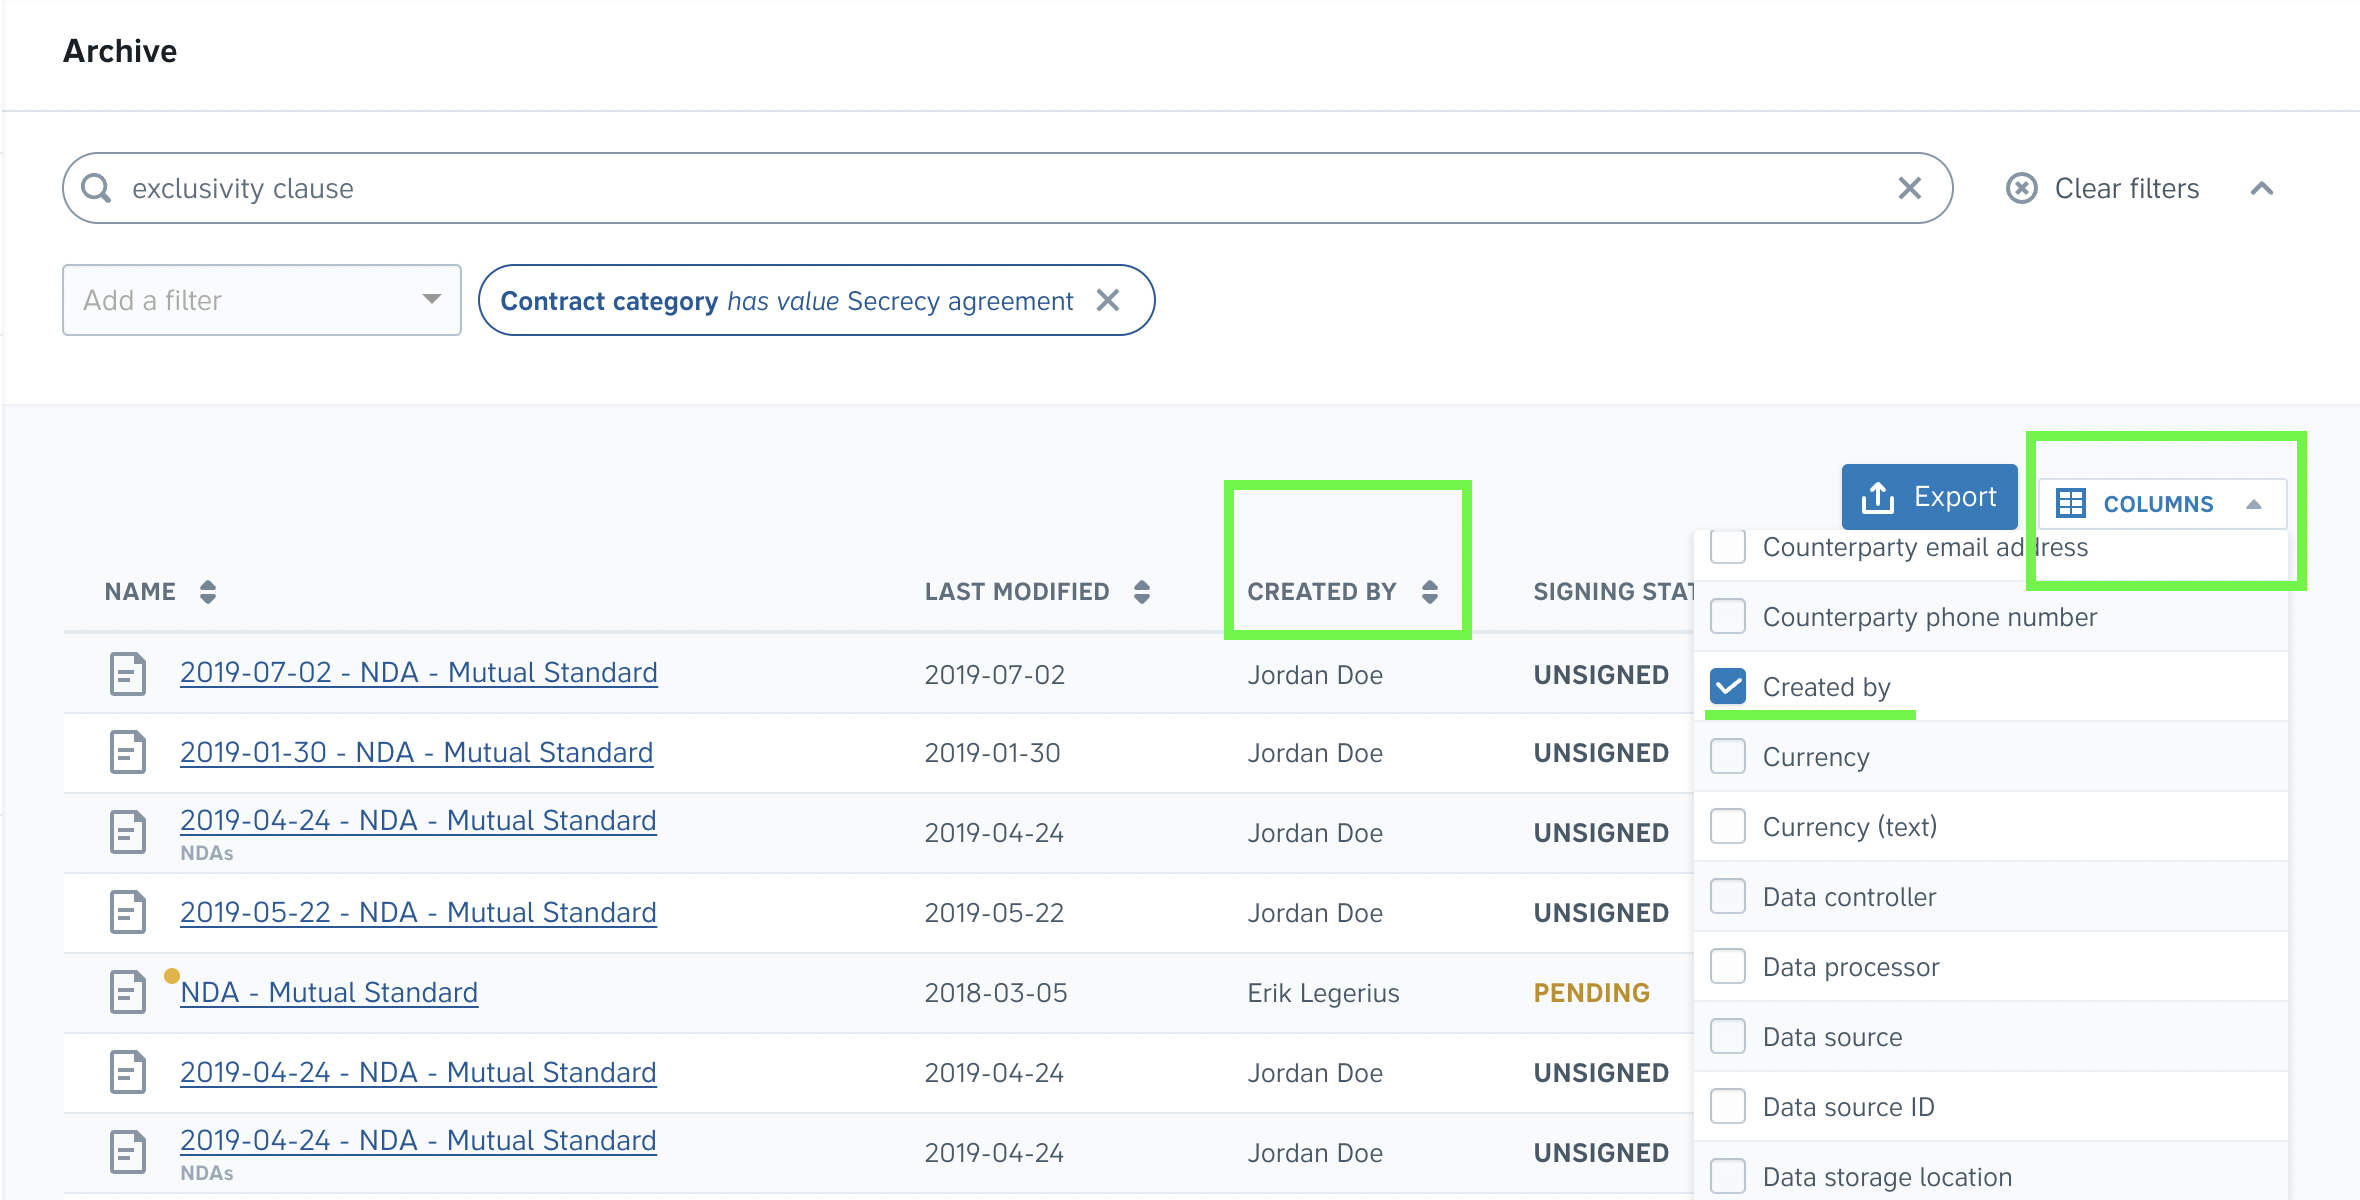
It's also possible to combine both steps above. For instance, by filtering for a Contract category and searching for Exclusivity.
You can also save frequently used filter combinations as segments for quick access.
Using metadata columns
You can add additional columns based on metadata to your archive view to see additional information about your contracts. To add columns in the Archive, simply
-
Click the Columns button on the right side above the default columns,
-
Check one or more metadata options to display that column (and information about your contracts) in the archive.
Note: The additional information of the column will only be shown if the contract has been tagged with that metadata. Don’t forget to add metadata tags to your contracts and templates.
Changing the access policy of a contract or template
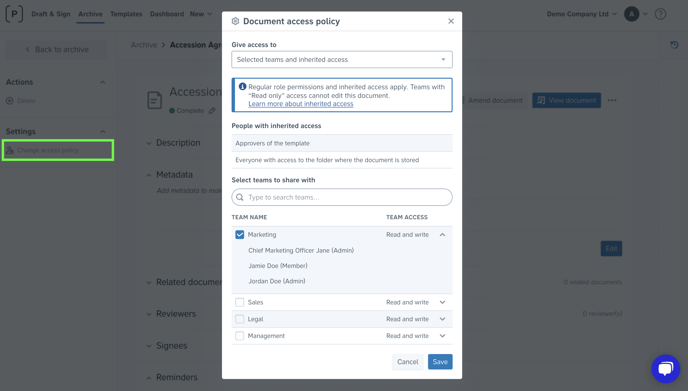
Access policies are used to limit access to specific contracts, templates, or folders. There are three levels of user access; Me and Admins/users with inherited access, Share with teams, and Everyone in the organization. Setting an access policy to Share with teams means that only the teams of your choosing can access that item.
To change the access policy of a contract or template, simply:
-
Click Archive or Templates in the top menu,
-
Click the contract or template that you wish to change the access policy of,
-
Click Change access policy on the left-hand side and select who gets to access the specific contract or template. Then click the blue Save button.
Note: If you select Share with teams as an access policy, you will be asked to select which teams can access the specific contract or template before clicking the blue Save button.
Changing the access policy of a folder
-
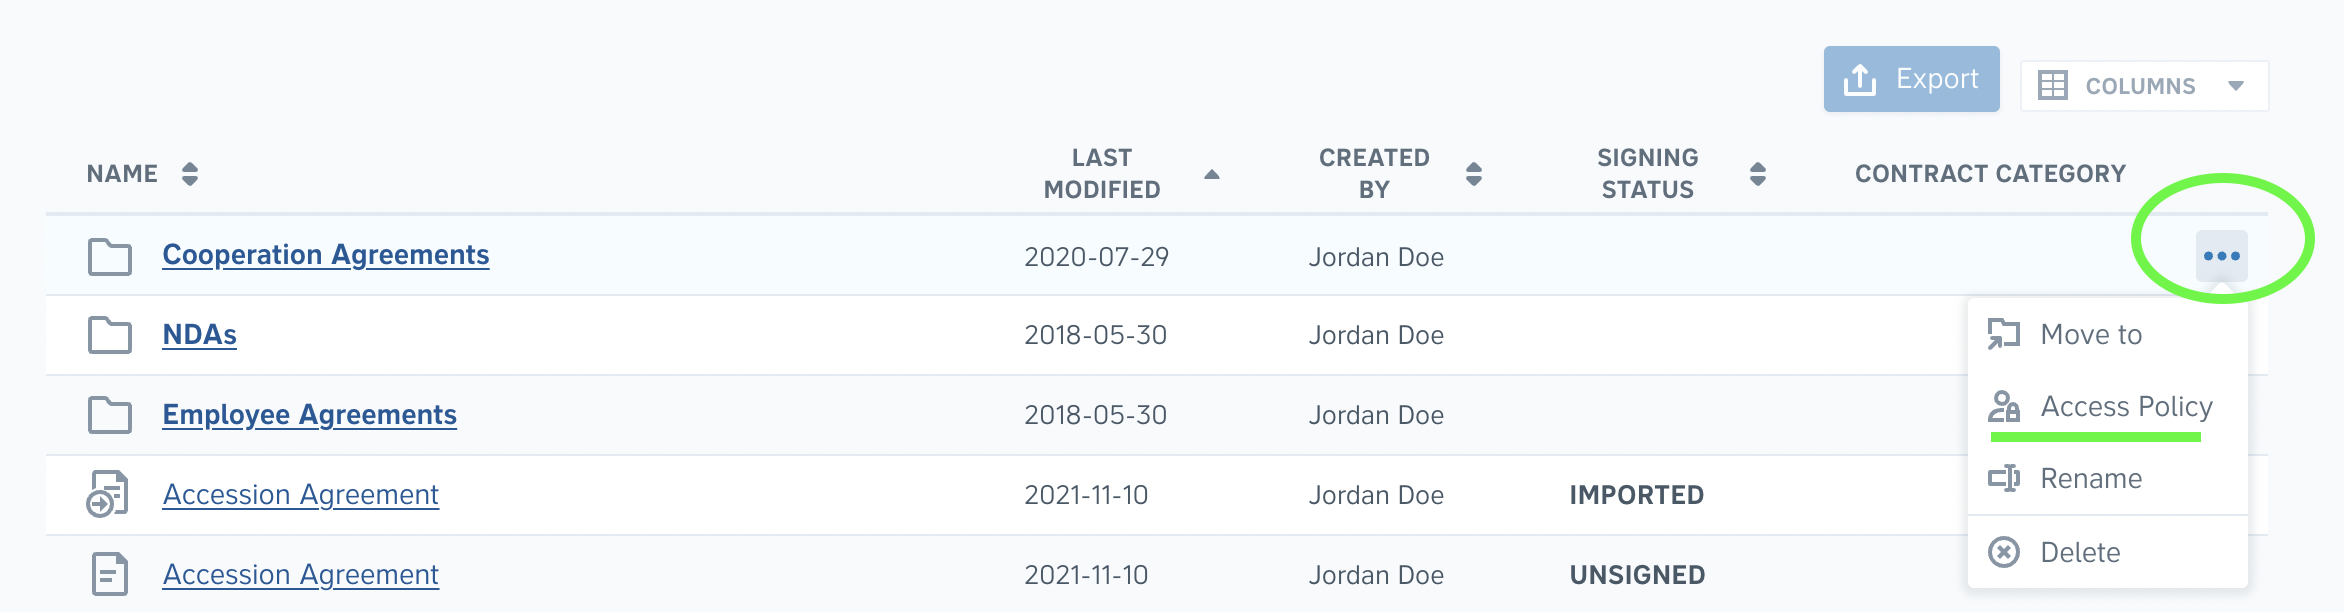
In the archive, click the Options button (the three dots) on the right-hand side of the folder where you wish to change the access policy,
-
Click Access policy, select who gets to access the folder, and click the blue Save button.
Note: If you select Share with teams as an access policy, you will be asked to select which teams can access the folder before clicking the blue Save button.